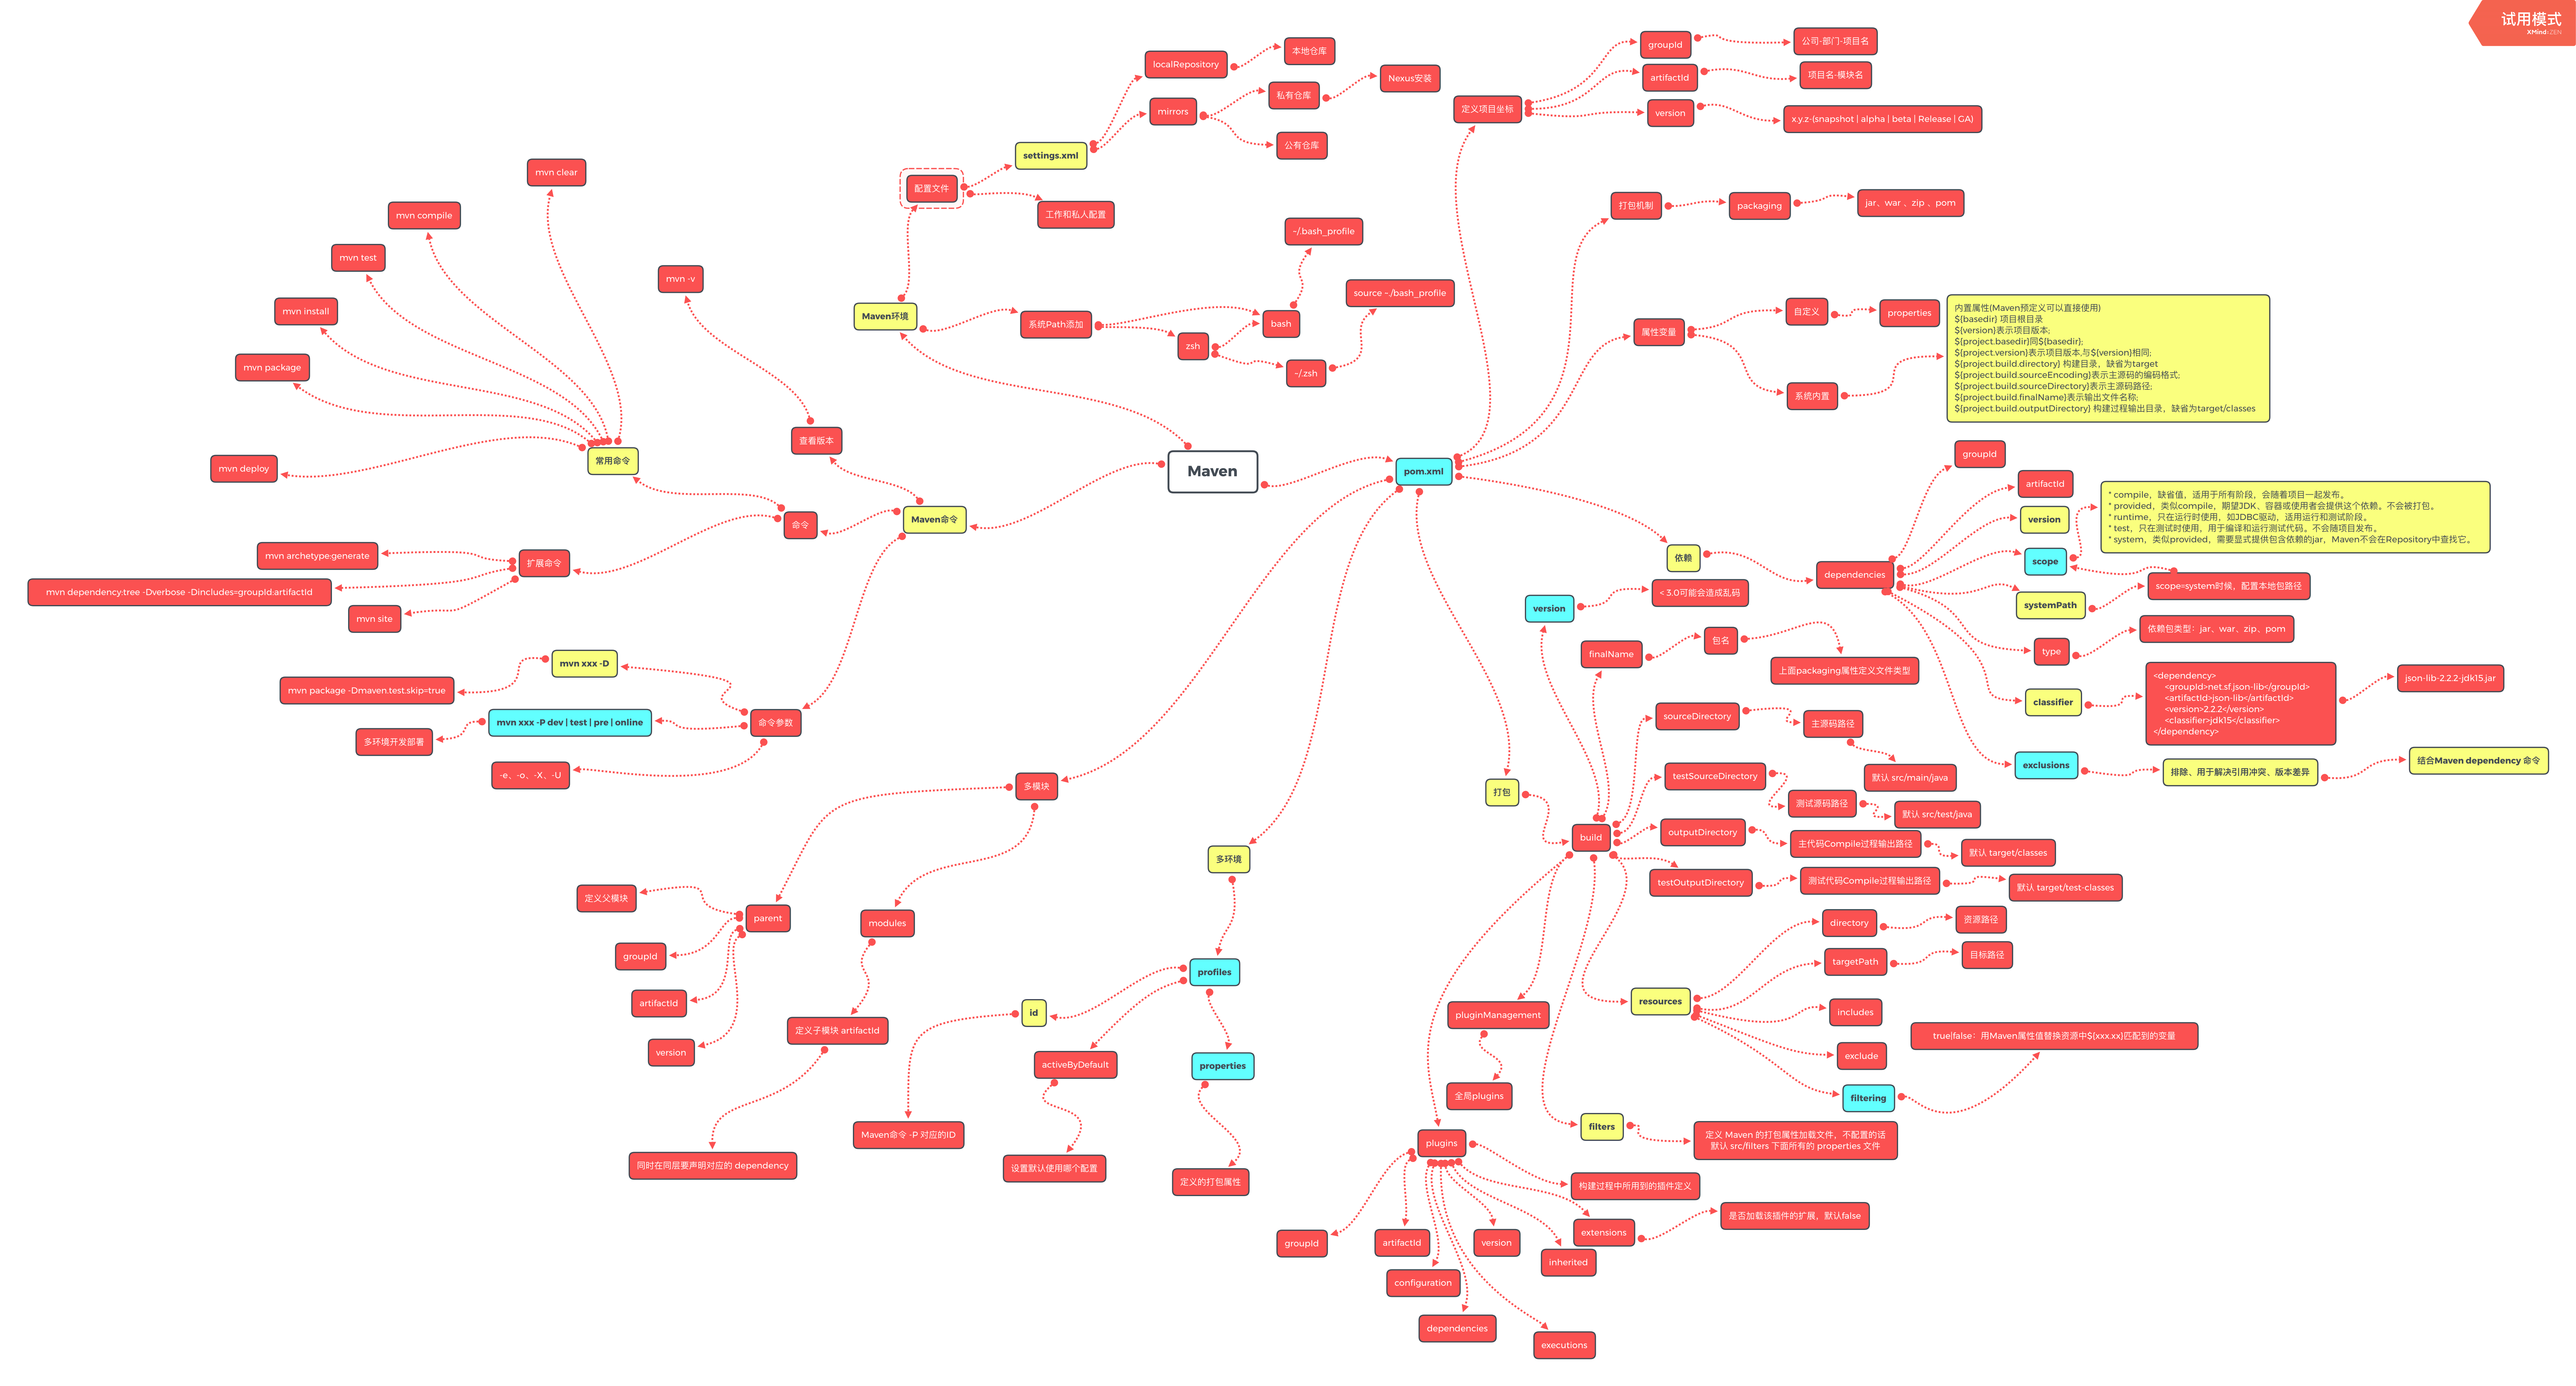
Maven 学习笔记
Maven安装
解压 https://maven.apache.org/download.cgi 最新版
配置 MAVEN_HOME 解压根目录,编辑环境变量 Path,追加 %MAVEN_HOME%\bin\
命令提示符下:
mvn -v
配置 \conf\settings.xml 文件,查找下面这行代码:
<localRepository>本地仓库路径</localRepository>
命令提示符下:
mvn help:system
Nexus安装
解压 https://www.sonatype.com/download-oss-sonatype 2.XX 版本
编辑环境变量 Path ,追加 解压根目录\nexus-版本\bin\
命令提示符下:
nexus
nexus { console : start : stop : restart : install : uninstall }

nexus install (可能会报错)
nexus console (也可以启动)
创建私有nexus
http://localhost:8081/nexus
默认管理用户名和密码为 admin/admin123
-
Repositories -> add hosted repository
添加两个repository, repository policy分别为release和snapshot
-
privileges -> add
给两个库添加权限 : name = 库名-privileges
-
roles -> add nexus role
添加role,分别为刚才添加的两个库的(view/create/delete/read/update)
-
users -> add nexus user
添加user,role为刚添加的role
发布项目到私有nexus
maven仓库的 setting.xml 里面配置
<servers>
	<server>
		<id>my-nexus-snapshots</id>
		<username>my-nexus</username>
		<password>admin123</password>
	</server>
	<server>
		<id>my-nexus-releases</id>
		<username>my-nexus</username>
		<password>admin123</password>
	</server>
</servers>
要发布的maven项目里面的pom.xml 文件配置
<distributionManagement>
    <snapshotRepository>
        <id>my-nexus-snapshots</id>
        <name>User Porject Snapshot</name>
        <url>http://localhost:8081/nexus/content/repositories/my-nexus-snapshots</url>
        <uniqueVersion>false</uniqueVersion>
    </snapshotRepository>
    <repository>
        <id>my-nexus-releases</id>
        <name>User Porject Release</name>
        <url>http://localhost:8081/nexus/content/repositories/my-nexus-releases</url>
    </repository>
</distributionManagement>
添加jar到私有库
在windows的cmd命令下,参考下面安装命令安装jar包。注意:这个命令不能换行
安装指定文件到本地仓库命令:mvn install:install-file
-DgroupId=<groupId>: 设置项目代码的包名(一般用组织名)-DartifactId=<artifactId>: 设置项目名或模块名-Dversion=1.0.0: 版本号-Dpackaging=jar: 什么类型的文件(jar包)-Dfile=<myfile.jar>: 指定jar文件路径与文件名(同目录只需文件名)
安装命令实例:
mvn install:install-file -DgroupId=com.baidu -DartifactId=ueditor -Dversion=1.0.0 -Dpackaging=jar -Dfile=ueditor-1.1.2.jar
扩展脑图
最近系统研究了下 maven,不详细整理了,给张全栈知识相关脑图
